Friday, May 10, 2024

Needle Book Tutorial on Off the Wall Friday


So, this week, I once again got after hand quilting Rain, Rain.  It dawned on me that it’s nearly 80% done and I could actually enter it in this year’s community fair if I finished it.  Well, as you probably


know, restarting a project is harder than it looks.  I had all these supplies – needles –
pearl cotton – needles threaders – thimbles and no idea which one I had finally decided on using.  Luckily, I had left the needle in where I last worked, and I could match the thread.  From there I found a great video that taught me how to figure out what type and size needle I was using.

This is my first attempt at Big Stitch Quilting and the transition from traditional quilting was not as easy as I thought it would be.  I think the hardest part for me was there was no must use size needle and thread.  It seems like everyone had different preferences.  So, for the record  - after much trial and error –  this is what worked for me

Mary Arden of England Embroidery Needle Size 7
Pearl Cotton Size 8 or 12
DMC Needle Threader – the blue plastic 3 head kind
Thread Heaven Wax
a hand quilting thimble

Once I figured that out, I thought wow, there must be a way to organize your needles, so you don’t forget.  Of course there is….A needle book.  Genius!  Oh, I needed one of those and looking on Etsy they were about $15-$25 each.  Hmmmmm then it dawned on me that at the recent Sewing Expo, I was taught that my sewing machine will do more than make quilts.  It actually will make other things!  So, I’ll make one or two … I mean how hard could it be?

I pulled out some prints I bought in a fat quarter pack from Hancock’s at Paducah cheapie.  I’ve been waiting for just a project to use them.  They are from Windham  Fabrics Alfie and Free Spirit August Wren collections and got to work on coming up with how to make them.

Here’s the tutorial – the pictures are for 2 because if you’re making one – you might as well make two.  They would make a nice gift!  (Yes, I do realize that what started out to be a day of quilting ended up being a day of me making two thread books … but that how my life goes!).  If I wasn't typing out the directions, it would take under an hour to make.

Needle Book Tutorial
Prep

1. Choose two coordinating fabrics that have some kind of body …  Quilt Cotton, Cotton Duck, Med Weight Home Dec Fabric (The cotton duck and home dec fabric shouldn't need interfacing)

2. Cut to desired size… I’m cutting mine to 4” by 5 ½ ”.  Cut 2 of the cover fabric and one of the coordinating fabric for the pockets. Finished size was about 3 ½” by 5"


3. Depending on your choice of fabric you might need to cut 2 pieces of iron-on interfacing to give the book a little more structure.  These should be just a scant smaller than your fabric rectangles.  Cut one piece of batting about 1” smaller than your cover pieces (mine are 3” by 4 ½”)

4. Cut 2 pieces of felt or felt like fabric about ½” smaller than your fabric (mine are 3” by 4 ½ ”)

5. Cut 1 piece of ribbon about 6” and one button of choice (if you chose to close your book with just ribbon  - then cut one long piece 12” or so)

Construction

1. Take your cover fabrics – wrong side up.  Place your interfacing onto the fabric with the rough glue side toward the wrong side of the fabric.  Iron per directions.

2. Take your pocket fabric – fold it length-wise with wrong sides together.  Press.

3. Lay one of the cover pieces right side up.  Place one pocket rectangle on it with the raw edges aligning with the bottom of the piece.  Pin 

4. Take your ribbon and center it along the right side edge. Pin.

5. Take the other piece of cover fabric and lay it right side down.  Pin around the edge leaving about a 2” opening at the bottom.  I used different color pins to remind me.

6. Sew around the edge with a ¼” seam allowance – remembering to start at the beginning of the opening and ending at the other side of the opening.  

7. For my example – red pin to red pin.  Leave the needle down while turning the corner.  

8. Clip the corners (make sure you don’t clip the stitches).  Turn it the right side with some kind of turning stick (I use a chop stick).  Remember you are turning the layer of the cover and the pocket.  Press your book flat.

9. Now slide the piece of batting into the inside, being careful it all lays flat.  I rolled the rectangle sides together to the middle and then put the little roll inside, then unrolled.

10. Top stitch 1/8th from the edge – remember use color coordinating thread.  Iron again.

11. Place the two pieces of batting centered in the middle of the pocket facing book.  Pin or clip them in place.  Measure and Mark the center line.  Sew.

12. Press closed.  I used my new press weight to get it really flat.
This is a HEAVY hunk of steel my husband made for a Christmas present - Cool Right?!

13.   Sew your favorite button to the top as a closure. 
Tin of Buttons I bought at a garage sale when I was 28 for $5

14. Decorate, label and personalize!


I still have to think about how I want to label mine.  In the excitement of coming up with a pattern for the needlebook, I forgot that the reason I did it was so I would remember what needle was what!

So, What Have You Been Up to Creatively?

You are invited to the Inlinkz link party!

Click here to enter

Friday, May 3, 2024

All About the Quilts On Off the Wall Friday

A Fantasy Garden, Christine Weise/Shelley Cassatta

You know when you go to a Sewing & Quilting Expo, you are overwhelmed by the amount of things to buy and classes to take.  Well at least that was how it was for me during the recent Cleveland Expo.  It was a lot!  But tucked in the back of the Expo were rows of black curtains, filled with the most gorgeous quilts!  SAQA had shared a few exhibitions and there were also some from the North Texas Quilt Festival.  The exhibit was so stunning, I ended up going through it 3 times during the day.  I thought I would share some of the highlights!

Crumbling, Janet Windsor

This piece was so stunning in person.  The texture that Janet brought to life was amazing. It was crazy! Here is a detail
Detail, Crumbling, Janet Windsor


Tiger's Eye, Heather Pregger

I love this piece because #1 it's by Heather Pregger and I love her work (she's so good at the whole improve piecing thing). #2  It's a terrific study in value.  #3  She achieves amazing movement with all straight lines.
The Language of Trees, Victoria Findley Wolfe

Symmetry, rhythm and movement is the story of this piece.  Plus - Victoria Findley Wolfe - enough said!

Sea Glass, Nancy Goodman

I found the composition of this piece brilliant - it's circular emphasis with a lot of rhythm thrown in to add interest.  Also, that palette is HOT - yellow, green, teal, orange with a great use of neutrals - brown and black.
Nice Ice #1, Caryl Fallert-Gentry

Yep, you read that right. This was made by Caryl Fallert-Gentry.  Obviously it's a huge departure from her other series.  Techniques she used were photographed digitally painted, thread painted and machine quilted.  Another great use of brown as a neutral.

There were so many more.  It truly was a feast for the eyes!!

So, What Have You Been Up to Creatively?


You are invited to the Inlinkz link party!

Click here to enter

Friday, April 26, 2024

Famore Rotary Cutter Review on Off the Wall Friday

 Okay, so I don't like change.  I know most people say that, but I really don't like change.  Of course, this

translates into my quilting life as well.  When I find a tool I like, I like it for life.  That would be why I am using the same rulers (Quickline designed by Nancy Crow) as I did 30 years ago.  Not to mention, I have my square rulers (Bias Square from the Patchwork Place) and rotary cutter by Kai.  When they wear out, I just check on ebay for replacements.  

That all said, I still keep my eye out for what's new in notions. That became a goal of mine on my recent trip to the Sewing & Quilting Expo in Cleveland.  There were a lot of notions there ... I mean lots and lots. But even with all there was there, I didn't really see anything that made me say Oh....My....Gosh!  Well, until there was.

I was sitting in a talk by Kathy Ruddy (who is a trip by the way) and she mentioned that she had a rotary cutter in her booth that worked with a ball bearing system. Oh, that caught my attention.  In my experience, ball bearings make everything run smoother.  Over at her booth, I got to try it out for myself.  That's when I said - OMGosh!

It's the Famore (Fa-mor-ay) Rotary Cutter sold by Famore Cutlery and it costs me about $24.  Price wise you can get an Olfa for about $15 and a Kai for about $20 (which is what I used for the last 30 years).

My old Kai


Things I like  ....

  • It has the same type of handle as my Kai - so it pretty much feels the same
  • Changing the blade is super easy because it has a big twist knob which easy twists on and off.  My Kai also has a twist nut change system but it's much smaller and it can be finicky.  Olfas use a washer system which is just one more piece to worry about when you are changing the blade.
  • The Ball Bearing system is just amazing.  I never would have believed how much smoother and easier the rotary cutter slides through my fabric. Less friction means less pressure on your wrist and hand.   You need to try it out for yourself to have your own OMGosh moment I swear!


Things I don't much like  ...
  • It has a push button safety shield mechanism (much like an Olfa's).  I'm used to my Kai pressure safety mechanism.  The push button is much easier though than ones I've used on Olfa's.
  • The color ....I know there are a lot of quilters that are into the whole pastel palette but that  pink thing is not my vibe.   I did see other versions with light blue and yellow but I would rather just have some dark color.
Let's talk blades...

Although the cutter will fit any universal 45 mm blades, Famore has two branded blades made especially by them.  One is the Professional Tungsten Carbide Rotary Blade for  - wait for it - $22 each and the SKS-7 Japanese Steel 2 Pack Replacement Blades which is tungsten steel and are $12 for two ($6 each).

They do have a sharpening service where with a 3 blade minimum they will sharpen blades for Famoré 45mm 400SK:.....$2/ea, Other brands 45/60mm:...$4/ea, Famoré 45mm 400TC:.....$5/ea.  (which includes the shipping back).


With that in mind, I did a quick price check (since I don't tend to go through a ton of blades anymore).  A 10 pack of Olfa blades is $33 on Amazon which to me is a great deal.  I never have had any problem with my Olfa blades so I don't think I'll change.  The whole idea of returning rotary blades back and paying $4 each to have them sharpened doesn't really make sense to me.  (They do however have a nice scissors sharpening service which depending on where you live might come in handy!)

Sooooooooo I will be adding the Famore Rotary Cutter to the list of "Notions that Changed my Quilt Life".  Now if they could make it in dark blue or green, I would be in heaven.

What Rotary Cutter are You Using Now and Why?


You are invited to the Inlinkz link party!

Click here to enter

Friday, April 19, 2024

Sewing & Quilt Expo on Off the Wall Friday

Waiting for the vendors to open!

Okay am I the only one who has never been to a Sewing Expo?  This year I finally got to attend since it was returning to the I-X Center on the westside of Cleveland...and let me tell ya....most of the women I talk to have been going for years.  After spending the day, now I understand why.

Reason 1 - the Expo encompasses all that is sewing and quilting - If it has to do with those two things, then you will find it there.  There were vendors for EVERYTHING which includes but not limited to sewing and long arm dealers, quilt shops, notion shops, vintage sewing supplies, embroidery supplies, hmmmmmm and even a tea vendor.


Reason  2 - There were talks going on two stages all day.  The talk were given by different vendors so they were on a wide range of topics but still all had to do with  - you guessed it - sewing and quilting.

Reason 3 - There was a really great quilt exhibit which included not only collections from SAGA but also challenges from different quilt guilds across the country.


Reason 4 - Maker Space where they had Make & Take projects for a nominal fee.  I think I saw at least 4 or 5 of them going.


Reason 5 - A full day of classes, anywhere from 1 hr lectures to 4 hr classes.  These weren't the most in depth classes but they weren't expensive, so they were good if you just wanted to try something out. 


Reason 6 - There was a pretty cool scavenger hunt where you ended up with a little prize at the end.  (I really had fun doing this because it made me really understand the layout of the expo!  Plus I get to try the little sewing clips they gave me!)

and finally

Reason 7 - A really nice door prize drawing at the end of the day which included 2 sewing machines.  Everyone gets together for the drawings and it was really fun.

Since it was such a long day, I'll keep this short, but let's just say it was worth $$.  I didn't buy a lot - 6 fat quarters of dupioni silk, a new rotary cutter that has BALL BARINGS!, a yard of batik rayon that is gorgeous, some amazing hugo tape and a few other notions.  

My mind is on overload and I'm not quite sure how ladies do it for the full 3 days....but they assure me they are!

So What Have You Been Up to Creatively?


You are invited to the Inlinkz link party!

Click here to enter

Friday, April 12, 2024

Let's Talk Improvisational Piecing on Off the Wall Friday


Curves II,  Nina-Marie Sayre
Improved pieced to a planned pattern

Improv Surface Design with a little bit 
of Improv Piecing, 


Taking a class in improvisational piecing, got me thinking of how many uses there are for the technique.  For that matter, how much a non-technique, improvisational piecing actually is.  The reason I say that is improvisational piecing's only rule is that there are NO RULES.  So, it can basically do whatever you want, whenever you want, letting your fabric, your vision or even your intuition be in
the driver seat. 

That can be very freeing or a little scary for a quilter whose modus operandi is to plan out a quilt before making it.  It's even scarier if they are used to following patterns and the fabric choices.  I never thought of it that way until I watched my class of traditional quilters take the plunge.  By the end of the week though, they all definitely got the hang of it for sure.  

So, want to dip your toe into the pool of improvisational quilting?  Here are some suggestions...

Improv pieced background....Give the background of your applique a little extra interest with making an improv background.  It's also a great way to play with the value of the background to give emphasis on your subject.

Notice in Praise Ladies II, I used an improv background gradate diagonally across the piece to give emphasis and movement to the subjects.

Abstract Improv piecing...In this quilt by Janet Windsor, she uses improv piecing for the whole composition.  She plays with both value and hue to get her point across.  I love how she improvs the strips but then pieces them into columns to give it added structure. 

Unnamed, Janet Windsor

Improv Traditional Blocks....whose says traditional blocks need to be made with a pattern?  The one I tend to see the most is the log cabin block.  BUT I ran across this challenge by Sarah Goer and found it super interesting.  She asked her group to improv the Sawtooth Star and they came up with these.  Traditional + Improv = VERY Interesting!

Sawtooth Star Challenge on Sarah Goer Quilts

Improv to Abstract the Representational...and that was where I'm going with this piece.  Now don't ask me EXACTLY where I'm going but it's at least the beginning of an idea.  To take something everyone recognizes and then to use improv piecing to give it a little twist!

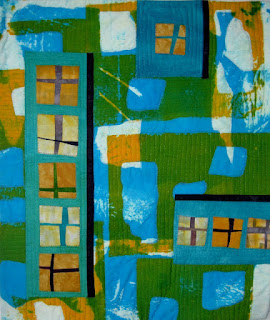
WIP, Houses

See what I mean?  You can take this simple idea of just piecing stuff willy-nilly (or not so willy-nilly) and come up with endless ideas.  Remember the only rule is that there is NO RULES. Remember you are the queen of your quilt.

Speaking of queens...

My classmate, Marsha G. sent me a project she did upon arriving home.  She took all her orphan blocks (left over blocks from other projects), improved them together and added a panel in the middle to get a totally new piece.  Didn't it turn out great?  I was so blessed to meet Marsha and her husband the first night we were there.  Plus, then we got to sit together all week in class.  Let me just tell ya, she literally sewed me under the table.  Nothing better than having a partner in class that will work as hard as you! 

Bring the Orphans Home, Marsha Gordon

So, I hope I gave you some ideas to start experimenting with piecing.  I mean we all have stashes to use right? 

And on that note...

What Have You Been Up to Creatively?

You are invited to the Inlinkz link party!

Click here to enter

Friday, April 5, 2024

Hemming Pants on Off the Wall Friday


 Okay, I have some secrets and since we've gotten close lately, I thought I would share 'cause what's good having a secret unless you're going to share it, right?!?

Secret #1 - Although I love clothes shopping, I hate shopping for pants.  The reason being is that I'm so curvy....no I mean, really curvy!  Whether I'm a size 8 or 18, I'm still one big curve and it's pretty hard to find pants to fit those curves.  Over the years, I have found brands that seem to have the right waist to hip ratio to fit me, but even than it's pretty hit or miss.  Plus, stores have pants all over the place

- in the misses - in the petites - in the women's - it's crazy!  Oh and did I mention the price of pants these days?  So, to combat all these evil forces, I have returned to my first love that I learned when I was young and on a budget.  I stopped in  at our local Salvation Army.  Our Erie thrift stores (Sal-Val, Goodwill, City Mission and now  AmVets) are HUGE, well stocked and well organized.  What I do is grab a wobbly cart, pull about a dozen pair of pants in an assortment of sizes and then head to the fitting room.  In about 20 min I have found at least 5 pairs that are in excellent shape and fit nicely. Mission accomplished and it's Easy-Peasy!  Not to mention, they are all name brands, I'm supporting a good cause, I know the pants all wash well, plusssssssss I got 5 pairs for $28.  

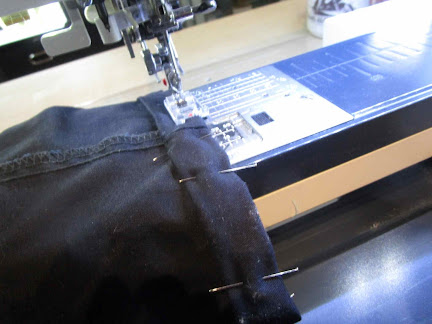
Secret #2 - When I say they fit, I mean in the waist and hip which are the crucial parts.  However, some were too long. So even though I've owned a sewing machine for 30 years, I have no idea how to do garment alteration, even simple ones.  I mean, I imagine a multi-thousand-dollar machine should hem a simple pair of pants, right?  But honestly, in the past if I had to do it, I've done them by hand like my Gram. This week, I decided enough was enough and turned to source of all knowledge, YouTube.  There I discovered Dominica and her amazing channel for beginner sewers. 


 By following her tutorial, How to Hem Pants with a Sewing Machine using a straight stitch which probably is the MOST beginner of all ways to hem, I finally managed it.  With careful measuring and pinning, I did it right on the first try and found it all very approachable.  After doing three pairs, I think I got it down.  I know there are other ways to do it with a blind hem stitch but maybe I'll try that next time.  Not to mention, that when I was researching to do my pants, I found Patchwork & Poodles blog post on using a Visible Hand stitched hem which looks pretty darn cool!


The one thing that she didn't mention which made my life easier was I had my Gram's, sewing gauge ruler.  For 4 bucks it makes getting the measurements super easy.  Plus I used Wonderfil's DecoBob for both top and bottom stitching since the fine gauge disappeared into the fabric.

Okay, now I know a lot of you out there already are hemming your pants, but if, like me, you've been just rolling them up, I encourage you to give this a try.  It was much easier than doing them by hand and it gives a great look!


Ohhhhh and in case you're wondering.....Yes, I did have all the fabric I needed for my recent class on improvisational piecing and Yes, I did manage to get it all filed back into the proper bins upon return.  I also, used the excuse to give the bins a good once over.  That whole bin system is working out well and it's so easy to rearrange things here and there if you need to!

So, What Have You Been up to Creatively? 

You are invited to the Inlinkz link party!

Click here to enter

Friday, March 29, 2024

Improv Piecing on Off the Wall Friday

Hard at Work

You know sometimes all you want to do is sew and boy, have I done that.  Taking Improvisational


Piecing with Veronica Hofman-Ortega
at John C. Campbell's Folk School was one of my better ideas.  I love a class that starts with design exercises that will lead into bigger and better ideas.  Not to mention the ladies in my class were great!  There was a full range of quilters in the class  - from the very experienced to the beginner.  All were traditional, so this was pushing pretty much everyone out of their comfort zone.  But let me tell ya, they were up to the challenge.  After the first day our design walls were already starting to fill up.  By the end, it was amazing what we all got done!

Sewing  + Challenges + Great Company = Perfect Class.

We learned all sorts of improvisational shapes - strips, triangles, curves.  All design exercises were pretty loose, and Veronica told us that we could play with them as much as we wanted.

The strips were to be made with black, white and a color.  This is where it took me...

It definitely needed some zing so I added lime green which I thought was much better.


The triangles gave me the most problem since the colors were #1 solids and #2 chosen from a limited palette.  I ended up with a design wall of pretty sad triangles.  We tried some improv curve piecing which I liked marginally better...but still sad.  


What's a girl to do?  Well, cut them up and try piecing them back together.  The most interesting idea was taking two triangles and curve piecing them together.  With a few of those units and more curves piecing, I ended up with this.  Interesting, but not completely finished.  


Finally, we could explore on our own, so I did some brainstorming which led me to these simple ideas (by this time, I was pretty tired)


This time I picked a palette I loved - orange, golden yellow, purple and blue.  By then end of the day I got what looks me to me like a Dr Suess house  - which makes me smile. All it needs is the roof!!  I'm kinda diggin' this idea.  I can see it leading to bigger and better things for sure!  It's fun to play something representational but still give it that improv twist.  


Improvisational quilting is really so freeing creatively.  It was extra fun watching the class see the joy of it.  So although tired ... I do have a full design wall!


So, What Have You Been Up to Creatively?


You are invited to the Inlinkz link party!

Click here to enter